Print and Email Folios by Source Account in Groups
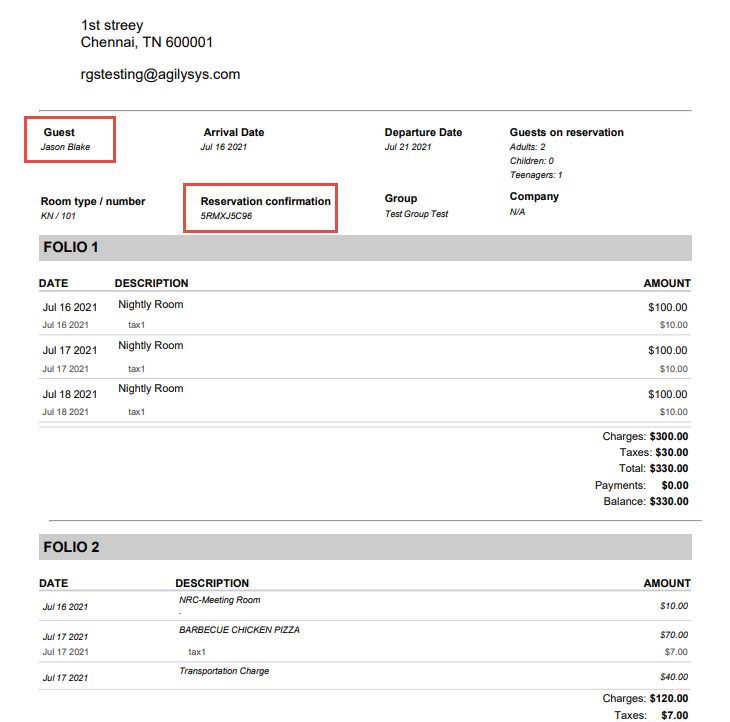
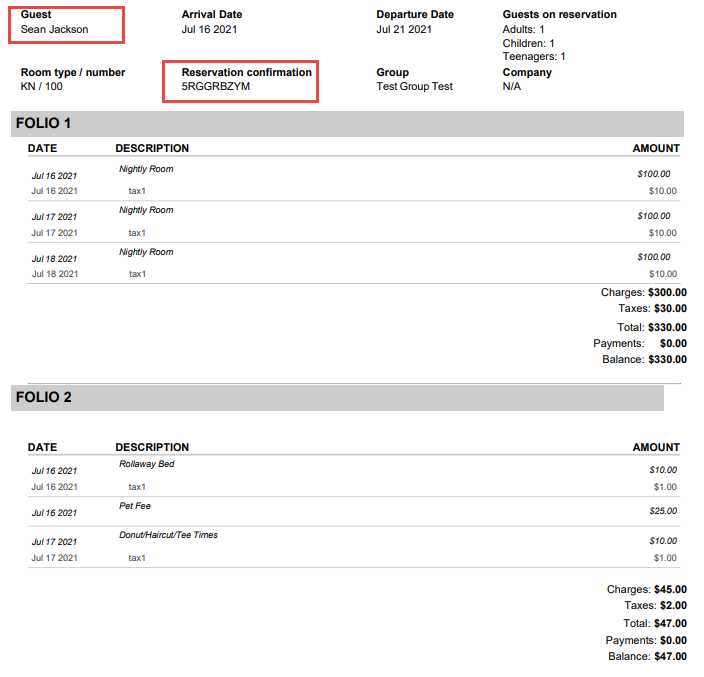
Stay allows users to include the individual folios of the source accounts of the charges routed to groups when users choose to print or email group folios. The individual folios of the source accounts (group reservations, individual reservations, A/R accounts, and house accounts) from where the charges were routed to a group is printed/emailed along with the selected group folios.
For example, consider a transaction item, Nightly Room Rate, transferred from a house account to a group, and another transaction item, Dry Cleaning, transferred from an individual reservation to the group. When users choose to print/email the group folios, the individual source account folios are emailed/printed in the ascending order of the confirmation of the source accounts.
When the checkbox, Create Folios by Source Account, in the Print Folio and Email Folio pop-up screens (Groups ➜ Folio & Routing Rules ➜ Print/Email Folio) is enabled, the individual folios of the source accounts are printed/emailed along with the selected group folios.

Importing a Rooming List
A rooming list is a list of reservations associated with a group block on the property. Users can create a rooming list with a template, or users can manually create a list.
Before users can create a reservation or add a rooming list, the associated group's status must be Definite.
At a minimum, add the guest's name and other required information. Users can update the group profile with more information at any time.
Importing a List with a Template
Navigate to Reservations ➜ Profiles.
Click the Groups tab to view the group reservations.
Click the group name for which users want to create a rooming list. The group's detail page appears.
If the list of groups is long, use the Group Status filters on the Groups tab to narrow the results.
Click the Reservations tab.
From the Staging table click Download Template.
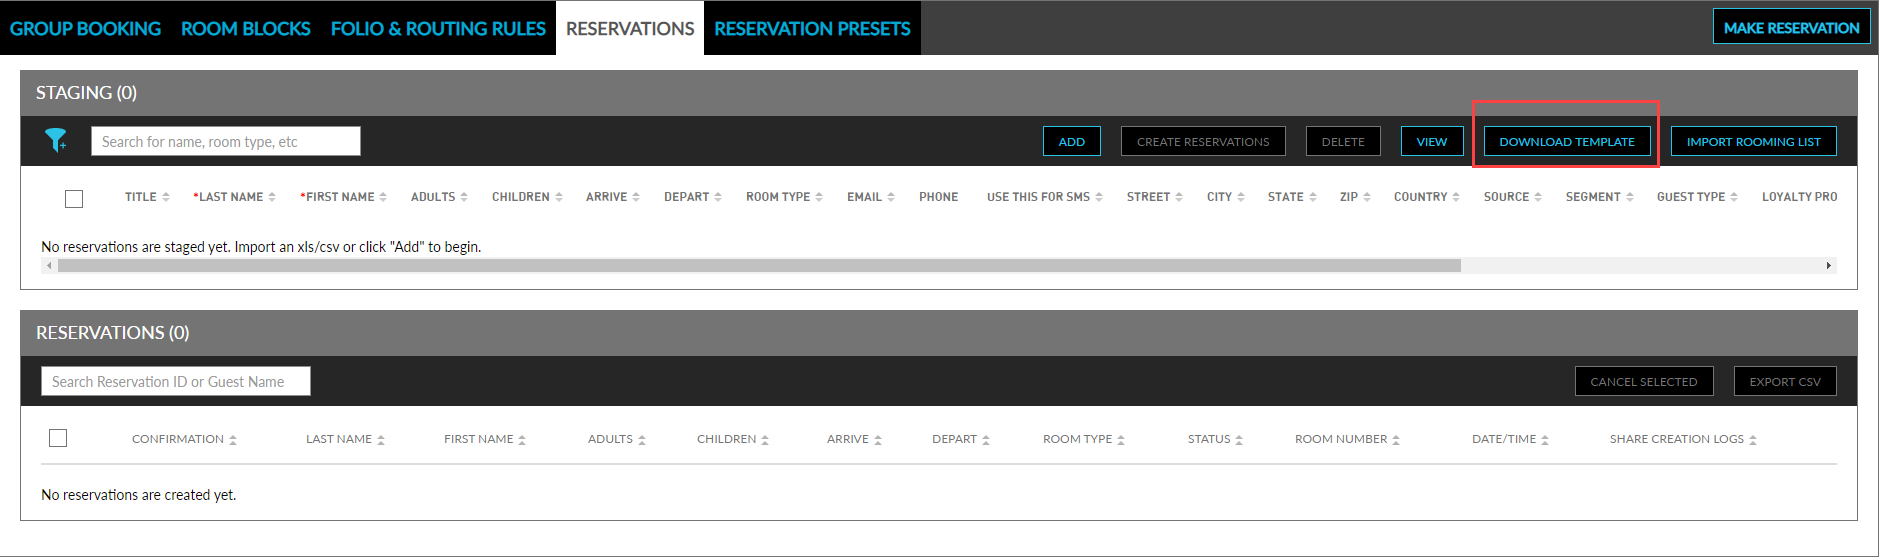
Click Download Template to open the rooming list template in Microsoft Excel.
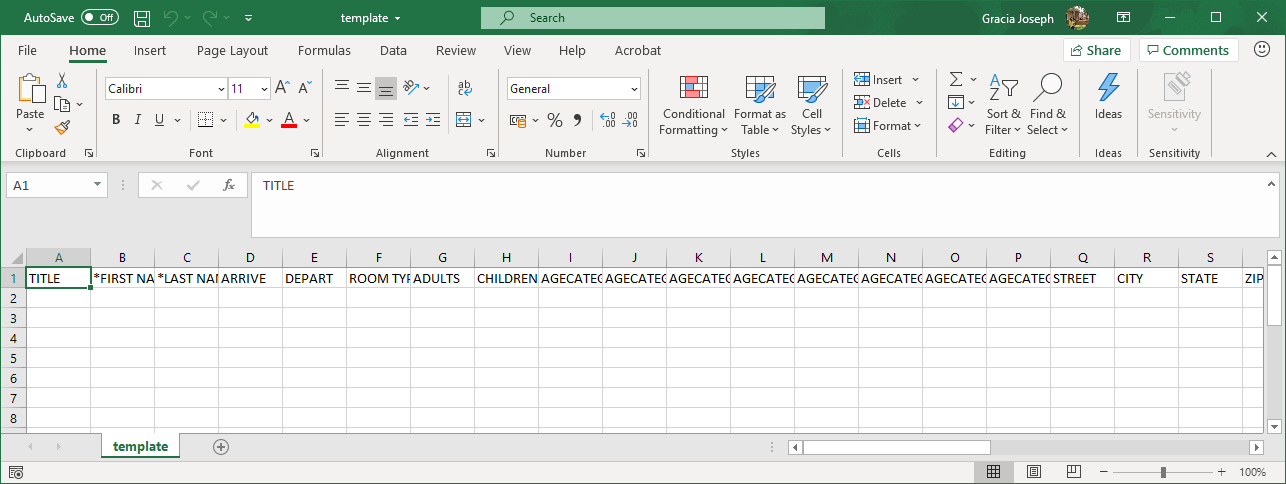
Enter all required information represented with an asterisk.
Microsoft Excel files hold data in a binary workbook format. XLS files can only be read by applications that have been especially written to read their format and can only be written in the same way.
CSV (Comma Separated Values) files are designed to be widely supported by applications and only hold data. For example, users can't do any text formatting.
Save and close the Excel file.
Open the Reservations tab in the group.
Click Import Rooming List. The Upload XLS OR CSV dialog box opens.
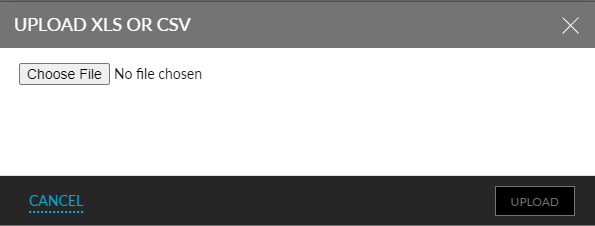
Click Upload. The Rooming List Field Mapping dialog box opens.
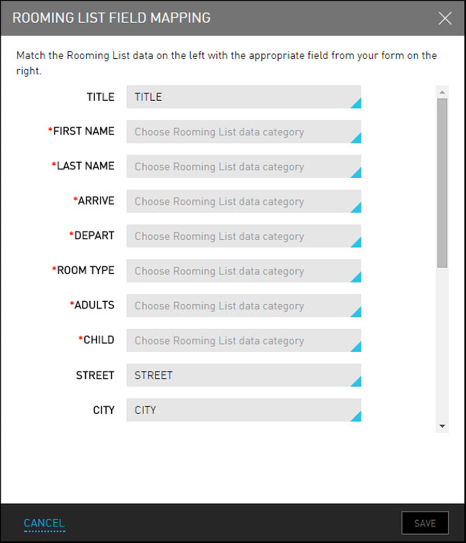
Match the rooming list data fields with the appropriate reservation fields from the form.
Click Save.
Update the staged rooming list, if needed. Errors found in the rooming list are highlighted and identified with an error message that will inform users of what needs to be corrected.
Click Save Changes to add the imported rooming list.
Once users save the imported rooming list, it cannot be updated by completing another import. Users must make any changes on the Reservations page in Stay.
Select the check box next to Title to select all items in the rooming list.
Click Create Reservations.
Clear the check box next to an individual item to exclude it.
Creating a Rooming List Manually
Navigate to Reservations ➜ Profiles.
Click the Groups tab to view the group reservations.
Click the group name for which users want to manually create a rooming list. The group's detail page appears.
Click the Reservations tab, and then
Click Add. The Record Detail page is displayed.
All required information is marked with an asterisk.
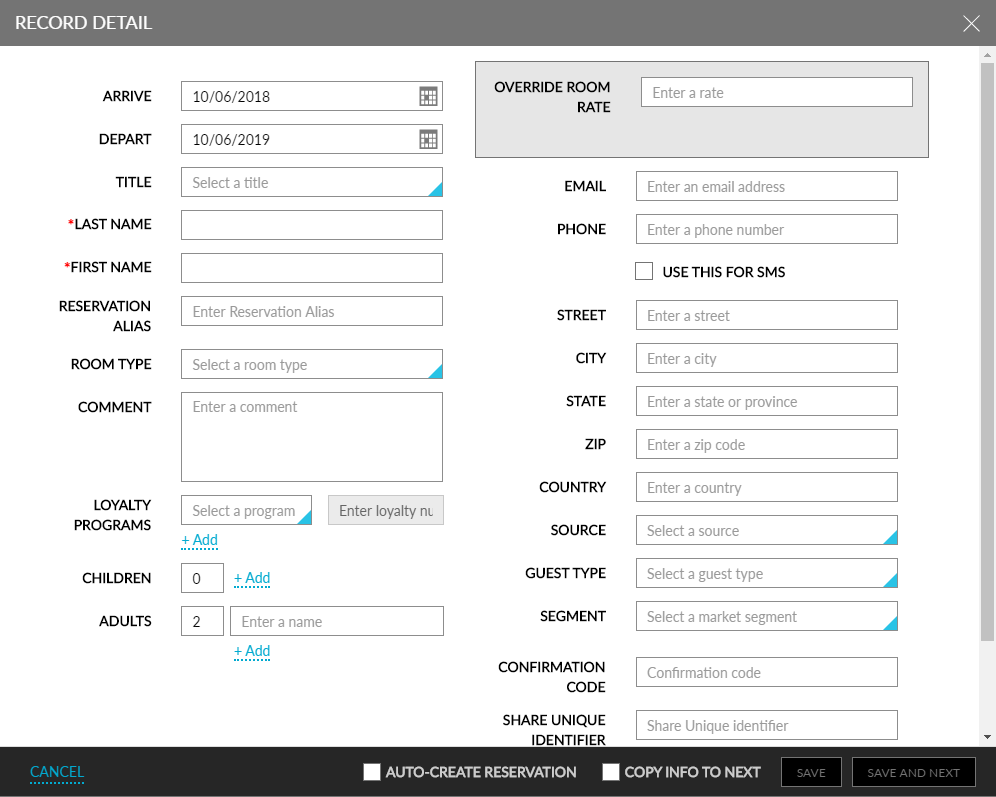
Enter the First Name and Last Name of the guest listed on the reservation.
Select the date on which the guest will Arrive and Depart.
Select Room Type. For example, Suite or King. Only room types that are available in the room block appear in the list.
Enter the number of Adults and Children that will be checking in.
Select the guest's payment method from the list.
Select the check box next to Title to select all reservations in the rooming list.
Select the check box next to Confirmation to select all reservations in the list.
Clear the check box next to individual reservations to exclude them from the rooming list reservations.
Select Create Reservations to move the reservation from the rooming list section and create the reservation. Create Reservations is used to create all reservations in the rooming list, while Make Reservations allows users to create an individual reservation from the rooming list manually.
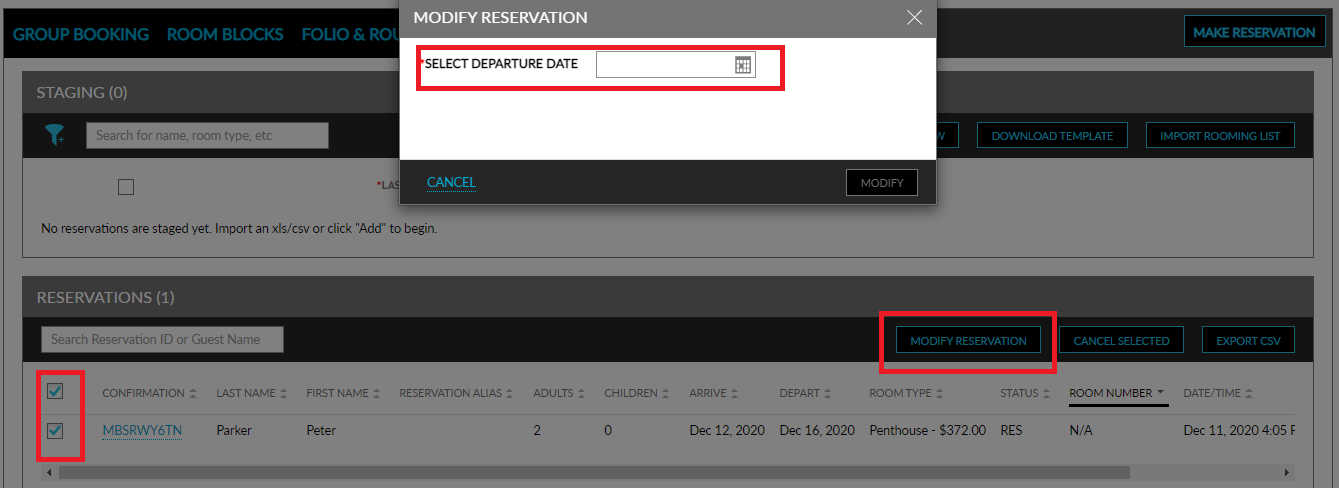
To modify the departure date for a reservation, select the reservation or multiple reservations using the checkbox next to the reservation confirmation and click the Modify Reservation button. Change the departure date using the Modify Reservation pop-up.
To remove a reservation from the rooming list, click the check box next to the reservation in the Staging section and then click Delete.
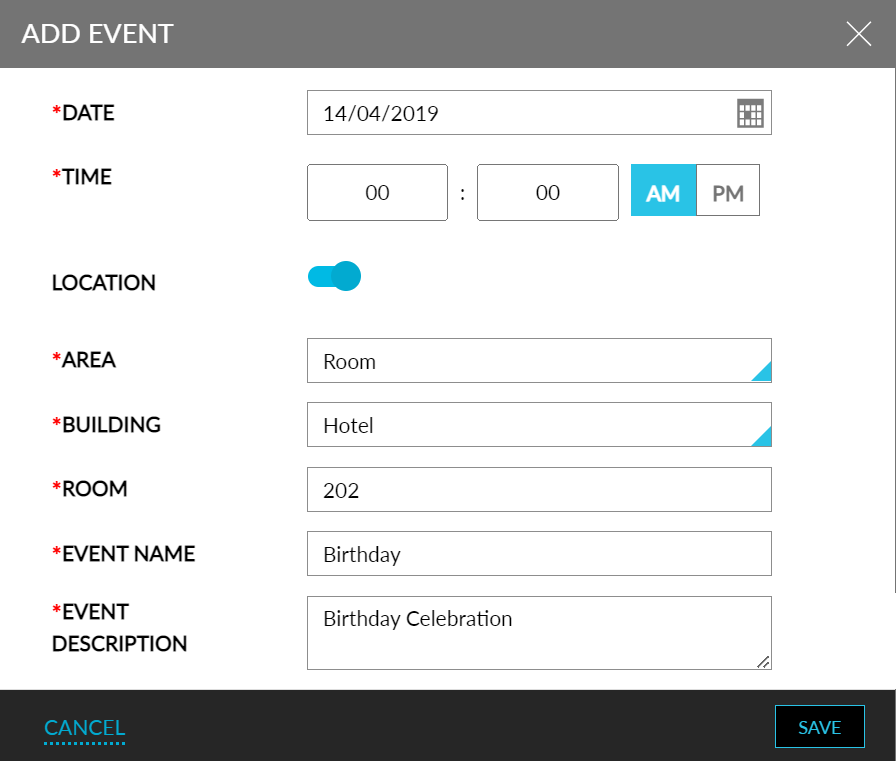
Group Events
In the Events section for Groups, users can add events for a group booking. Navigate to the Events section in a group booking to add or edit events.
Modifying Group Arrival and Departure Date
A group booking’s arrival or departure date can be preponed or postponed as per the group’s requirement.
Navigate to Reservations ➜ Profiles.
Click the Groups tab to view the group reservations.
Click the group name for which the status of a room block must be checked. The group's detail page appears.
Click the Departure field to modify the departure date alone and click Save Changes to alter the departure date for the group booking.
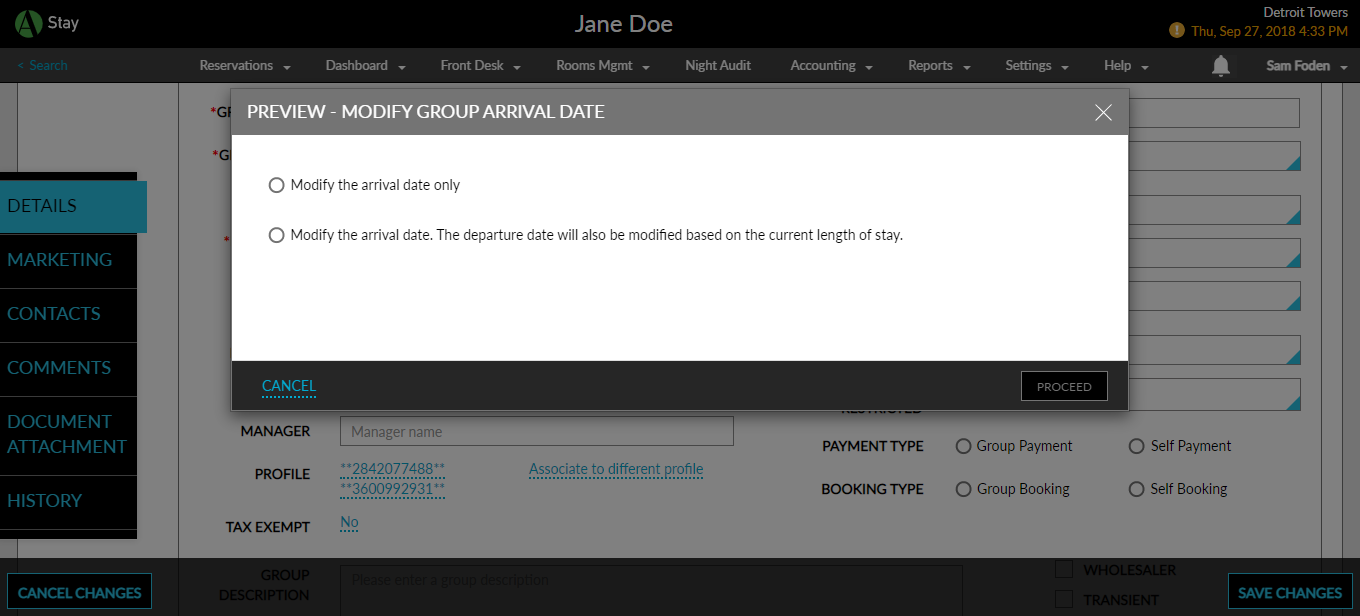
A group booking’s arrival date can also be preponed or postponed as per the group’s requirement. The following are the options provided to the user when modifying the arrival date:
-
Modify the arrival date alone. Here, only the arrival date set for the group will be modified, and this would not impact the individual reservations within the group.
-
Modify the arrival date and departure date. In which case, the departure date will be automatically modified based on the current length of stay. Also, the arrival and departure dates of all the individual reservations that are part of the group will be changed in the same pattern.
Modification of arrival date is not possible when:
-
a non-group rate plan is applied to the group booking
-
there is a scheduled room move across multiple room types
-
multiple rate plans are involved
-
the group booking involves comps
-
the group’s Arrival Shoulder Date is out of range
-
there are checked in reservations in the group
Select one among the two options in the Preview - Modify Group Arrival Date pop-up screen to modify the group's arrival date.
Click Proceed to close the pop-up screen.
Click Save Changes to confirm the modification of the arrival date.
Group Settings
Group-specific settings can be set in the Reservation Presents tab.
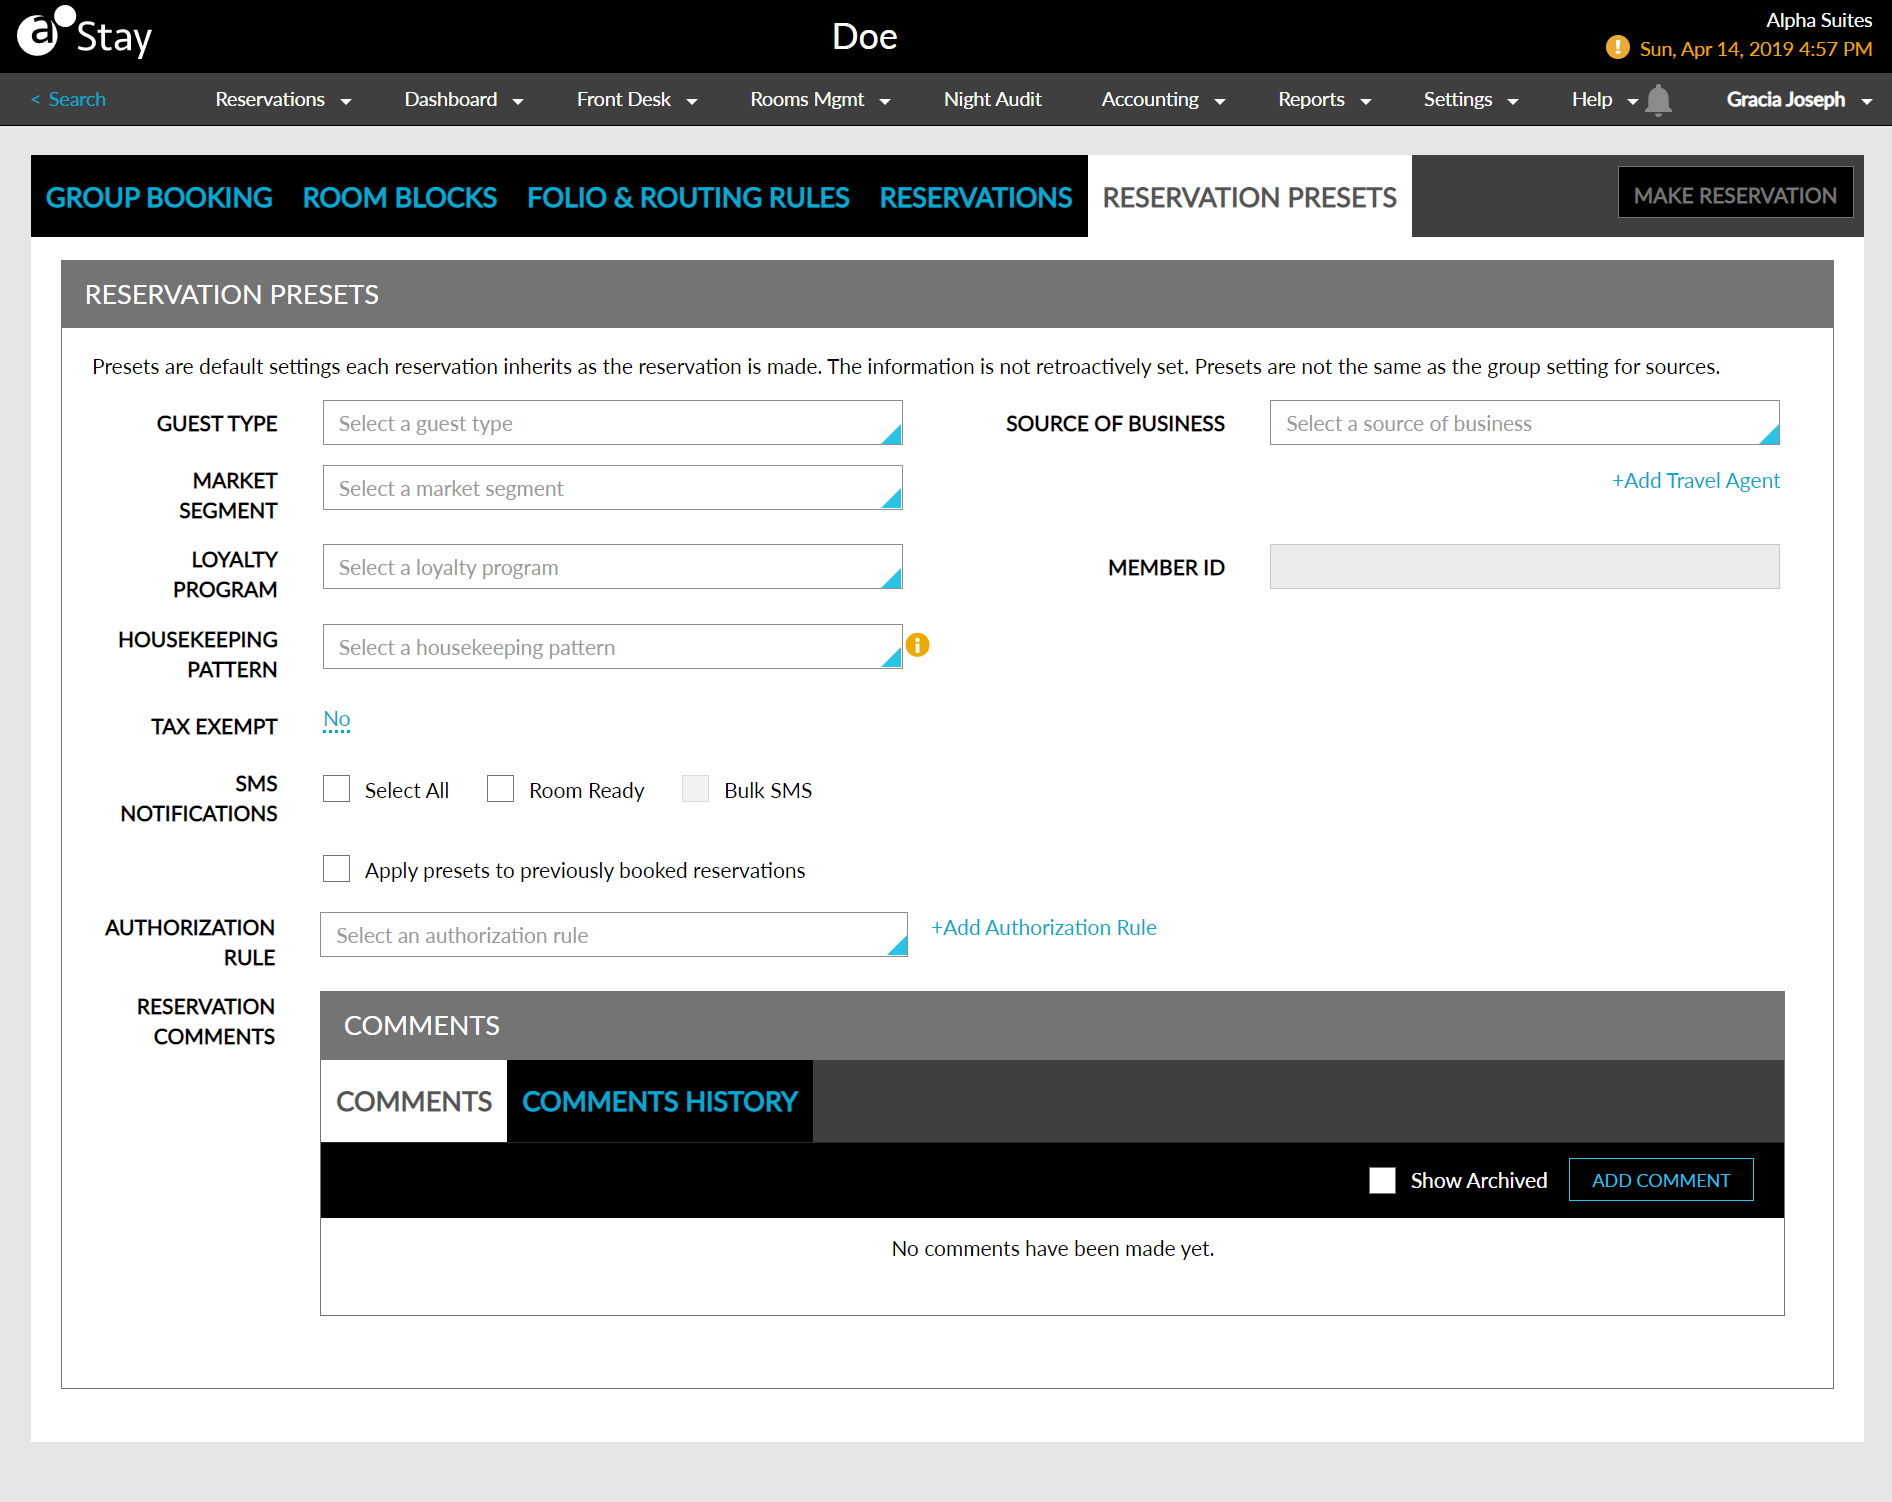
Refer to the following table for filling the fields (all the fields are optional):
|
Field |
Description |
|---|---|
|
Guest Type |
Select the guest type from the drop-down list. |
|
Source of Business |
Select the source of business from the drop-down list. |
|
Market Segment |
Select the market segment from the drop-down list. |
|
Loyalty Program |
Select a loyalty program from the drop-down list. |
|
Member ID |
If a loyalty program is chosen, enter the member ID. |
|
Housekeeping Pattern |
Select the housekeeping pattern from the drop-down list. |
|
Auto Recurring Charge Rule |
Select the auto-recurring charge rule from the drop-down list. |
|
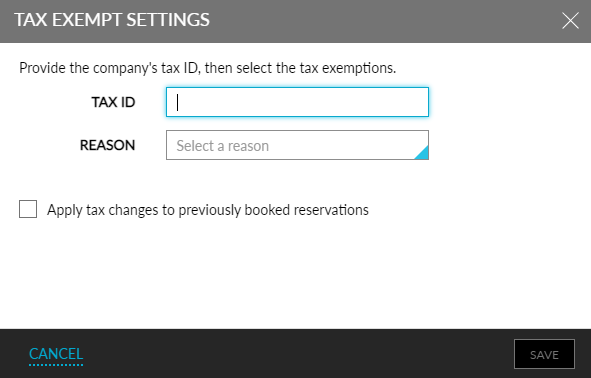
Tax-Exempt |
Click No to provide tax exemption. The Tax-Exempt Settings pop-up screen opens. Enter the tax ID and reason and select if tax changes are applicable for previously booked reservations. |
|
SMS Notifications |
Select between room ready, web check-in, web checkout, bulk SMS, or select all. |
|
Apply Presents to Previously Booked Reservations |
Select to apply the settings to previous reservations. |
|
Authorization Rule |
Select an authorization rule from the drop-down list or create a new authorization rule by clicking the +Add Authorization Rule button. |
|
Reservation Comments |
Add comments, manage comments, and view the log in the Comments History log. |
Click Save Changes to save the settings.